Setting up an isolated Linux Bridge in Proxmox

This guide covers how to create a private network between Virtual Machines (VMs) or containers using a Linux Bridge (vmbr) that is not connected to a physical network port. This allows internal communication between specific VMs while isolating them from the external network.
Step 1: Create a New Linux Bridge
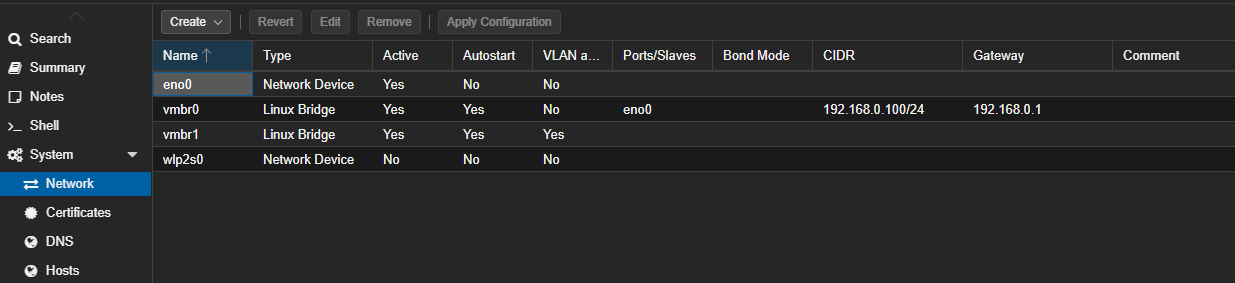
- Navigate to your Proxmox Node and select the System > Network tab.
- You will see the default bridge (usually
vmbr0) which is connected to your physical network port. - Click on Create at the top menu and select Linux Bridge.
- In the creation dialog:
- Name: Give it a name (e.g.,
vmbr2). - IPv4/IPv6: You can leave these blank for this specific isolated setup.
- Bridge ports: Leave this BLANK. This ensures the bridge is not connected to any physical interface, keeping the traffic private.
- Name: Give it a name (e.g.,
- Click Create.
Step 2: Apply Configuration
- After creating the bridge, you will see it listed in the network configuration area.
- Click the Apply Configuration button at the top to make the changes active.
Step 3: Configure Virtual Machines
Now, connect your VMs to this new isolated bridge.
For Server 1:
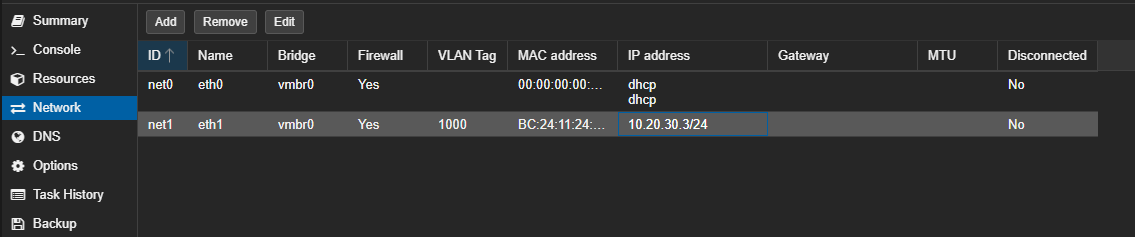
- Go to the Hardware or Network settings of your first VM.
- Edit the Network Device.
- Change the Bridge to the newly created one (e.g.,
vmbr2). - Set a Static IP for the interface (e.g.,
10.20.30.2/24). - Do not set a Gateway, as this network has no access to the outside world.
- Apply the changes.

For Server 2:
- Go to the settings of your second VM.
- Change the Bridge to the same isolated bridge (
vmbr2). - Set a unique Static IP on the same subnet (e.g.,
10.20.30.3/24). - Again, leave the Gateway blank.
- Apply the changes.
Step 4: Verify Connectivity
Access the console of your VMs to test the connection.
- Test Internal Connection:
- From Server 1 (
10.20.30.2), ping Server 2:ping 10.20.30.3. - You should receive a successful response, confirming the VMs can talk to each other.
- Repeat the test from Server 2 to Server 1.
- From Server 1 (
- Test Isolation (External Connection):
- Try to ping an external address like Google:
ping google.com. - This should fail if only
vmbr2bridge is assigned, confirming that the network is truly isolated and has no internet access.
- Try to ping an external address like Google:
Step 5: Test Network Speed with iperf3
To ensure your internal bridge is functioning at the expected speed (virtio drivers often allow speeds much higher than physical 1Gbps hardware), use iperf3.
Note: Since these VMs are isolated from the internet, you should install iperf3 before isolating them or by temporarily adding a second network interface with internet access.
1. Prepare Server 1 (The Listener):
Run the following command on Server 1 to listen for incoming connections:
Bash
iperf3 -s
You should see a message saying "Server listening on 5201".
2. Run Test from Server 2 (The Client):
Run the following command on Server 2 to send traffic to Server 1:
Bash
iperf3 -c 10.20.30.2
3. Analyze Results:
You will see output similar to this:
Plaintext
[ ID] Interval           Transfer     Bitrate
[  5]   0.00-10.00 sec  15.5 GBytes  13.3 Gbits/sec                  sender
[  5]   0.00-10.00 sec  15.5 GBytes  13.3 Gbits/sec                  receiver
- Bitrate: This column shows your speed. Because this is a Linux Bridge within the kernel (and likely using VirtIO drivers), you should see speeds significantly higher than standard 1Gbps ethernet (often 10Gbps+ depending on CPU power), proving that the internal routing is efficient.
Conclusion
You have now created a private network segment. Traffic between these VMs will remain local to the host and will not traverse your physical network router or switch.
Member discussion